
Pre, Pro & Post-biotics
Did you know it’s not all about the probiotics?
That they are only part of the story?
That pre-biotics and post-biotics are just as important.
Pre-biotics are the food/fuel that probiotics need to grow and multiply. They are essential for us. Some prebiotics are onions, garlic, bananas, leeks, asparagus, legumes, chicory root, and Jerusalem artichoke. We need prebiotics if we expect the probiotics we consume to help our health.
Probiotics are live good bacteria in fermented foods and drinks (like sauerkraut & kefir), you’ll also find them in lesser quantities in yogurt and probiotic supplements. When we consume them, they help replenish an out of balance digestive system, which in turns benefits our hormones, mood, energy, immunity and much more.
Postbiotics are no longer alive, but are bioactive compounds (enzymes, short chained fatty acids etc), that probiotics produce when they consume prebiotics. This is why even though our digestive system will destroy many probiotics as they pass through it, it does not destroy the postbiotics.
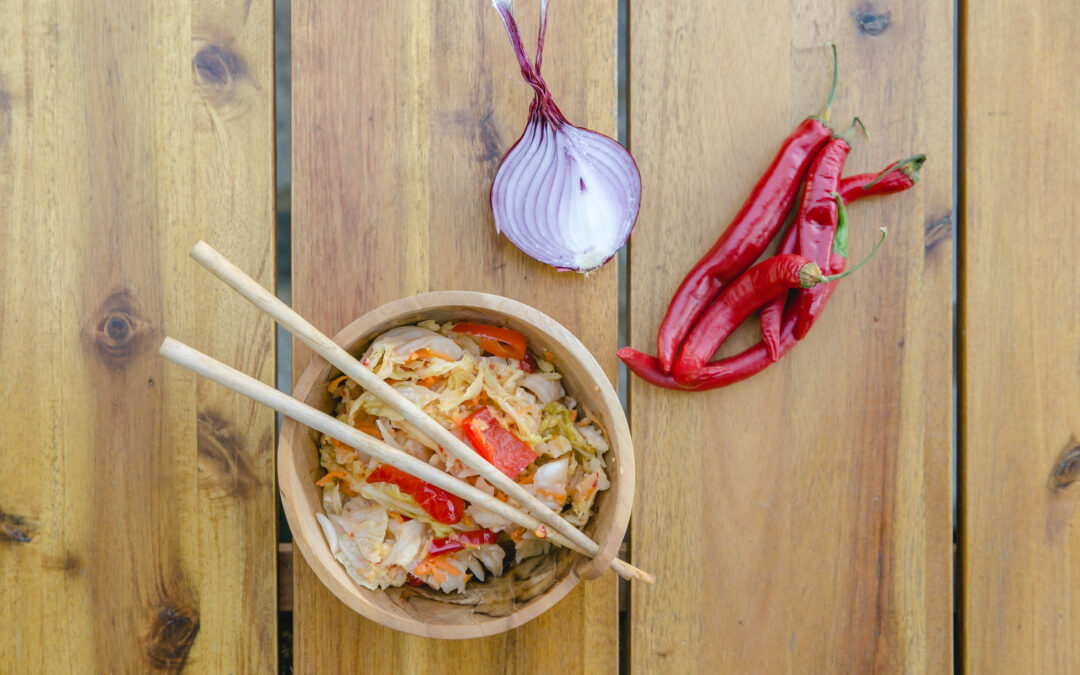
So, to benefit from probiotics we really need to consider are we consuming enough prebiotics too? Luckily, most fermented foods also include many prebiotics too. Kimchi for instance has garlic, onions, ginger, peppers, radish and of course cabbage, which are all prebiotics. Almost everything in Kimchi is prebiotic and probiotic, so this will then produce a lot of postbiotics too for you.
Here’s my super easy Kimchi recipe for you!
Easy Kimchi Recipe
Ingredients
1 medium green cabbage or Chinese cabbage, shredded
1 bunch green onions or 1 small white or red onion, sliced thinly
1 large carrot, grated
3 cloves, minced
3cm of fresh ginger, minced
½ a red pepper, sliced thinly
1 inch of fresh horseradish minced (or 2 or 3 of any other spicy radish sliced).
½ to 1 tsp. of chili flakes (or powder)
1 ½ tbsp. of Himalayan or Sea-salt
1 tsp. fish sauce or half 1 tsp. of seaweed flakes (optional)
Directions
Place cabbage into a bowl with the salt and squeeze (or pound down with a kraut pounder) the mixture until liquid/brine starts to come out of the vegetables. You can leave it covered in the bowl for a few hours and come back to do this bit and that’s easier. Get as much liquid out of the cabbage as possible as this will form your brine.
Add all the other ingredients to the bowl and mix well.
Place into a wide-mouthed jar and continue to pound down until juices come up and cover the vegetables. (If this does not happen, then add a little fresh water until it covers the cabbage well.) Leave at least 2 inches at the top with nothing in.
Place a whole cabbage leaf over the top of the vegetables (and under the juice/brine), making sure no air can get to the vegetable’s underneath. If you have no cabbage leaf left, then use wax paper, a boiled stone, a sterile weight of some sort or even a bag of salted water (the salt is there in case the bag splits) to weigh it all down.
Store away from direct sunlight, in a place not to hot or not too cold, on a plate or saucer (in case of leaks if you have overfilled), with the lid loss or remember to burp daily. Leave for at least a week, but preferably 2 – 4 weeks.
For more healthy hints, tips and recipes check out my books on this link here.
And, of more support with your health check out my online membership site here, it’s free to join for a month and totally rinse all the resources in that time and come along to our live sessions too.